In this post I will show you how to modify your scooter’s seat to move yourself back a bit and thus create more legroom.
The tutorial is about Honda S-Wing 125, but almost every scooter’s seat can be modified this way. They are all made in a very similar way.
Honda S-Wing is a very nice maxiscooter but there is one problem with it: if you are more than 170cm (5’7) tall the ergonomics of the seat is not fantastic.
You are a bit cramped, if you put your legs forwards on the pedestals that are provided your knees are almost touching your chest.
After an hour of riding you’ll be sore.
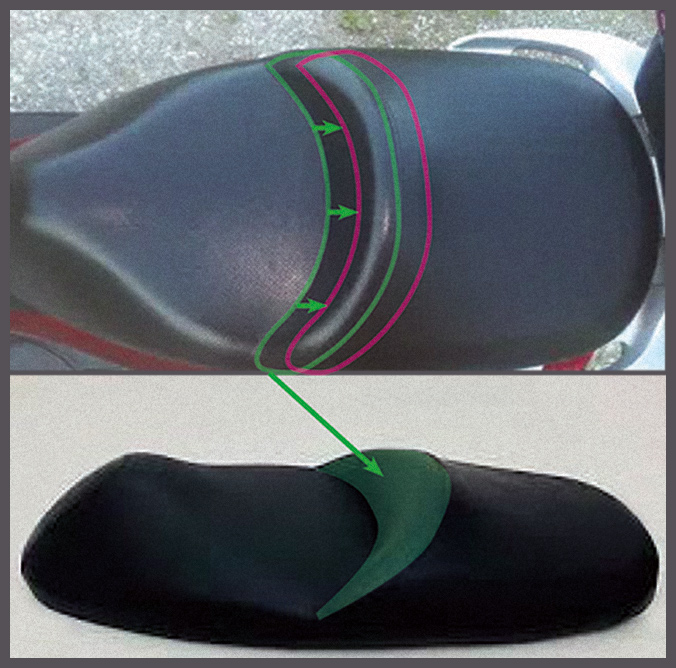
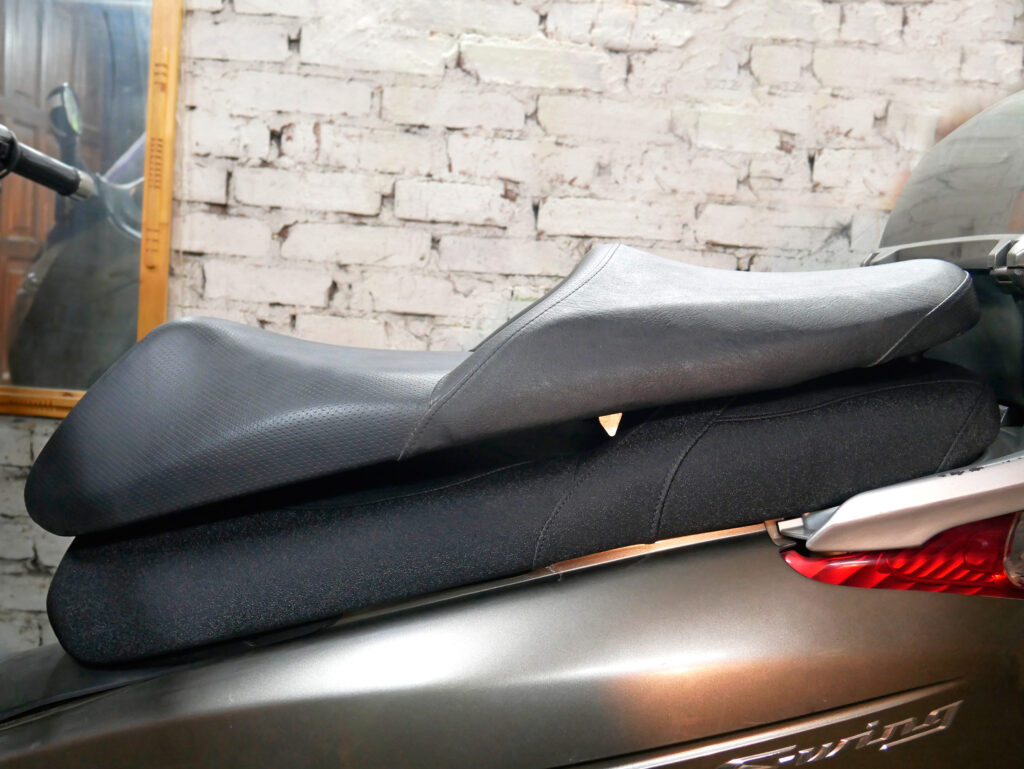
Moving the „hump” that separates driver’s and pillion’s seat 8cm (3in) back makes a whole world of a difference.
If you do this, you get comfort of Honda Forza on S-wing.
Of course – the pillion passenger will have less room. This modification is an option for those riding solo most of the time.
Why not give the seat to a motorcycle upholstery shop?
Few of those workshops doing motorcycle seats will want to take the job.
Why?
Because in order to move the „hump” separating driver from pillion you need to modify the plastic structure the seat is built upon.
These guys know it and few of them want to do it. If they do, they will charge you an arm and a leg.
Like tinkering with motorcycles/scooters? Get some good free books about motorcycle mechanics and riding, details here.
Seat modification involves not only foams and upholstery itself, it is a change to the whole construction of the seat.
Fortunately, S-wing (and many other scooters) have seat that allows modification while keeping the original foams.
This makes the job way easier for the upholstery folks, and less expensive for you.
Let’s start the modification
First of all get a used S-wing seat. Do not work on the one you have, because you will put your scooter out of service for the duration of work.
Also when it is time to sell your scooter, buyers may prefer original seat.
Used seats are very cheap.
Just make sure there is no holes in the seat, foams need to be intact as we will re-use them.
If you plan to re-use the existing upholstery (it is possible, you will need to sew a bit though) pick one with upholstery in good condition too.
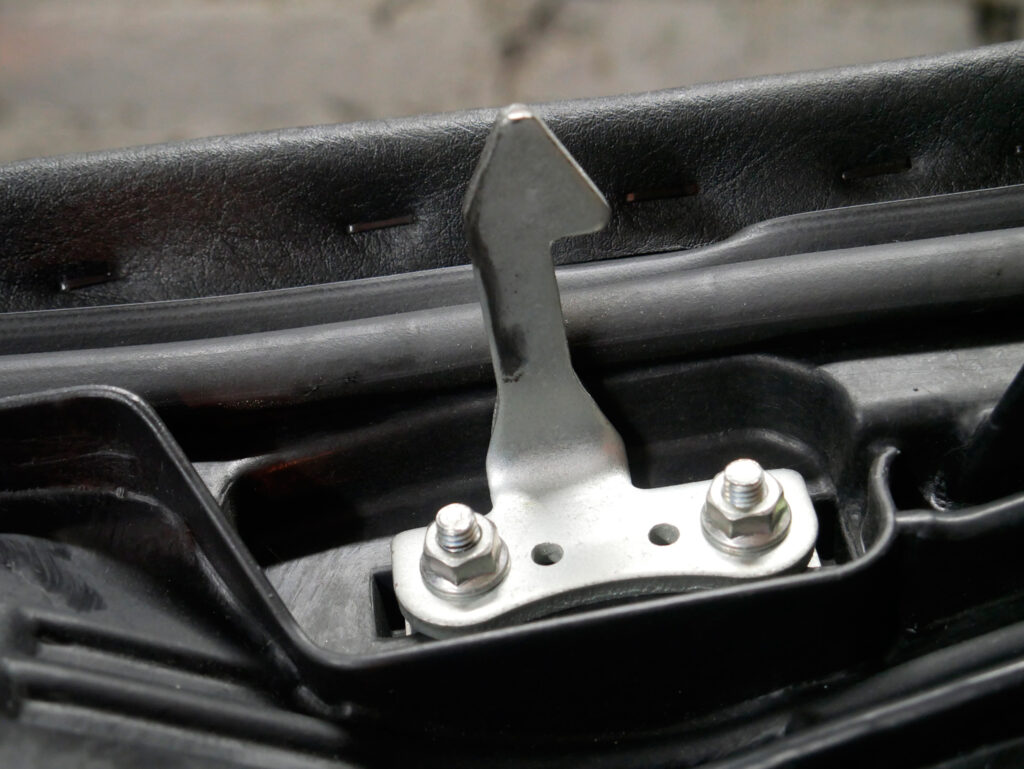
Make sure the threads of the three mounting screws are in good order and that the hook locking the seat in place is not damaged.
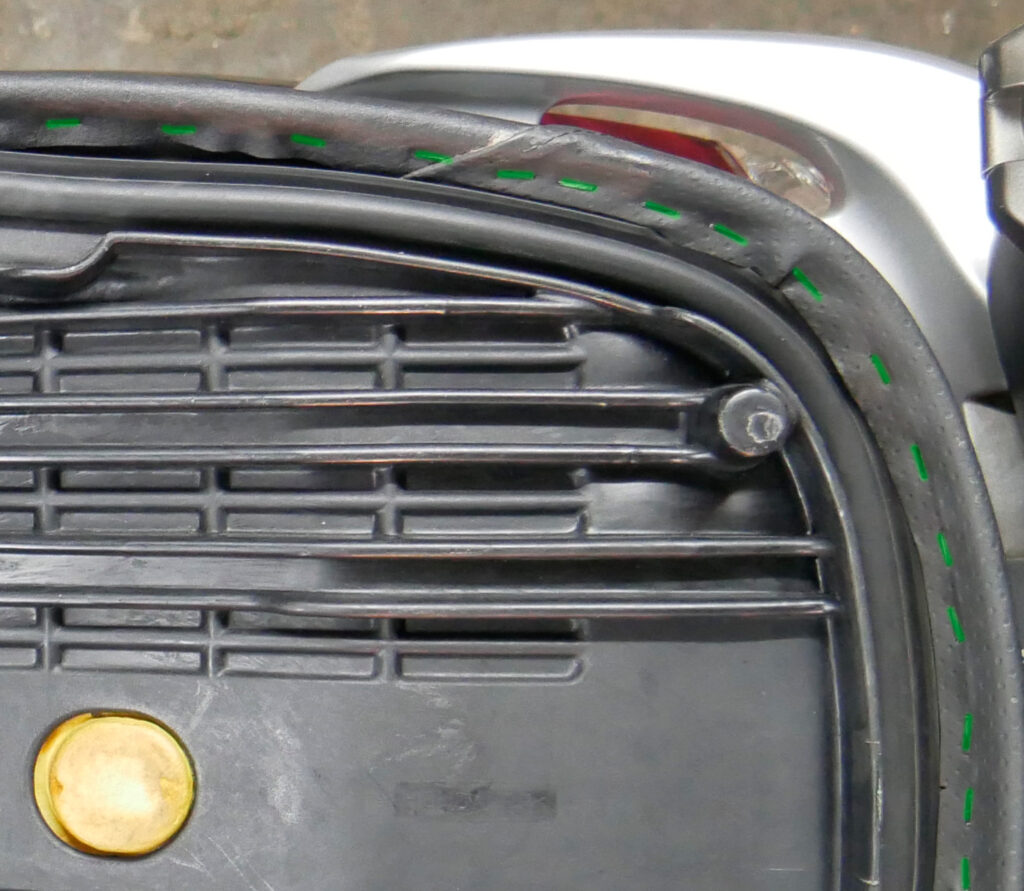
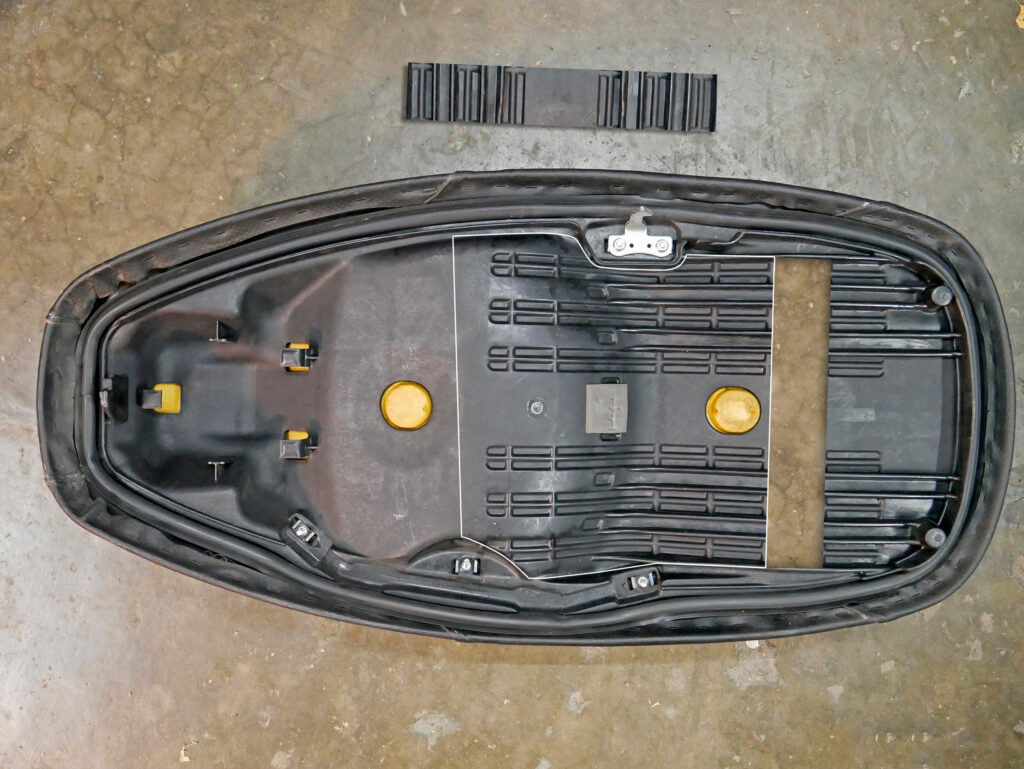
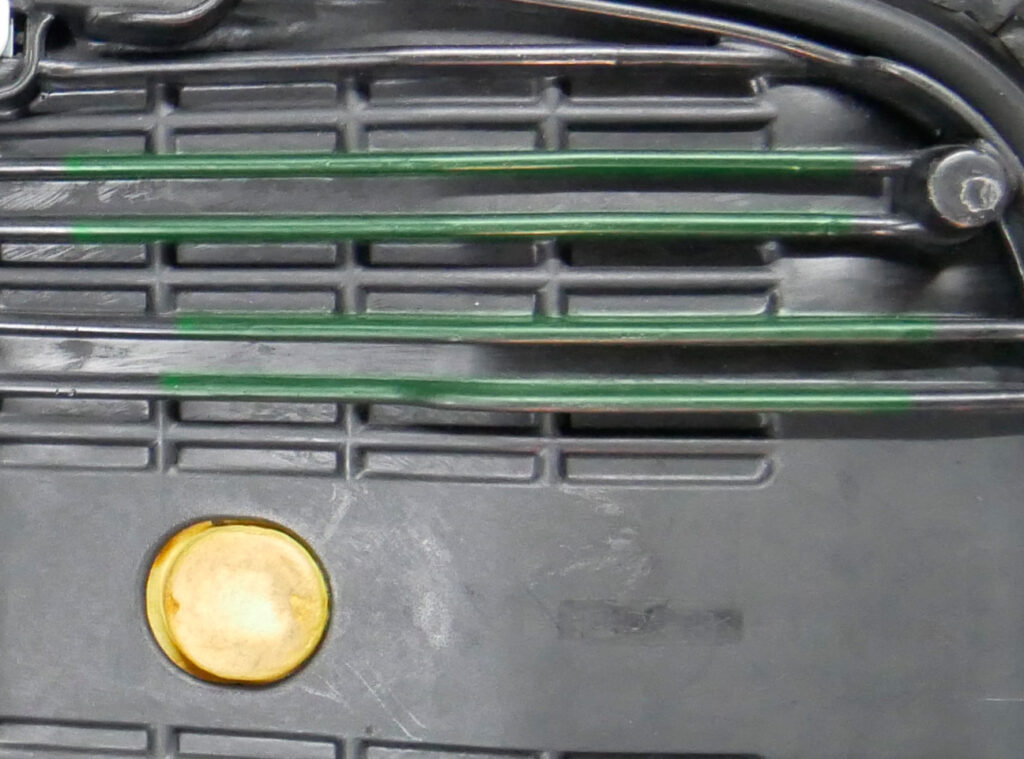
You start by removing existing upholstery. You do this by removing staples holding it, marked in green on the photo:
Once the upholstery is removed, you will see seat foam consisting of two separate elements.
We will cut this filling in a way, that all important elements will be still in the same place.
We will reuse the bit taken from passenger seat to put it on driver’s seat.
This can be done because in S-wing there are spots that are roughly the same width – we will cut there.
By leaving all other elements where they originally were we avoid making those tight-fitting foams from scratch.
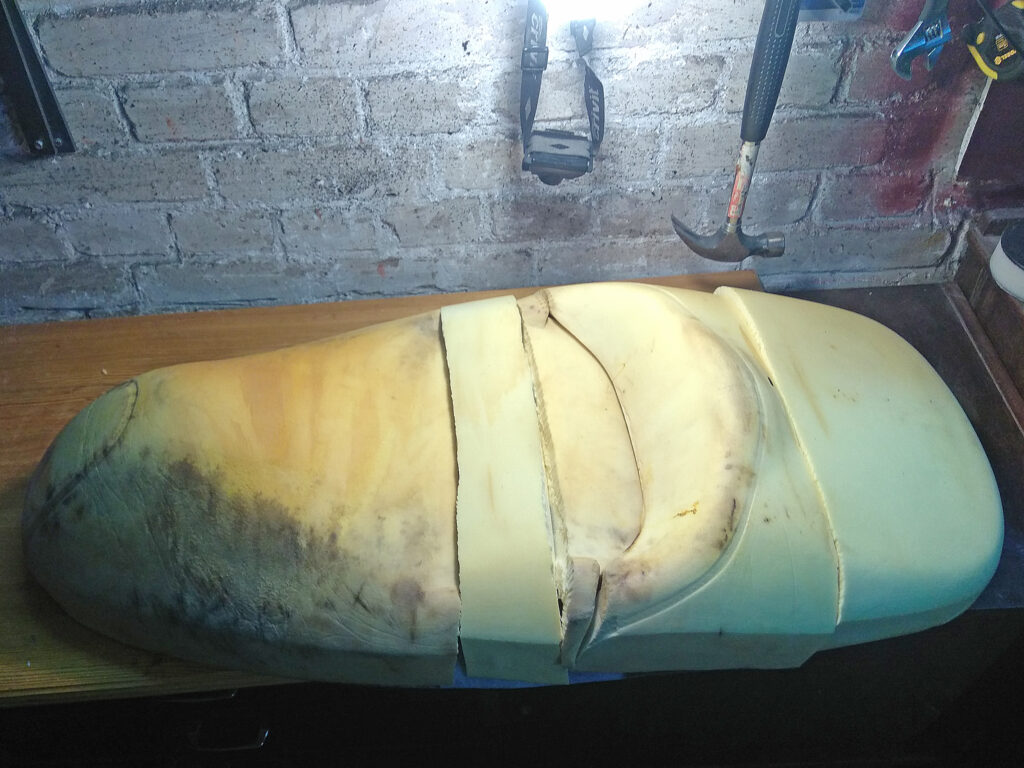
The above approach makes this job economically viable. If you had to pay for new foam, the job would be not worth it.
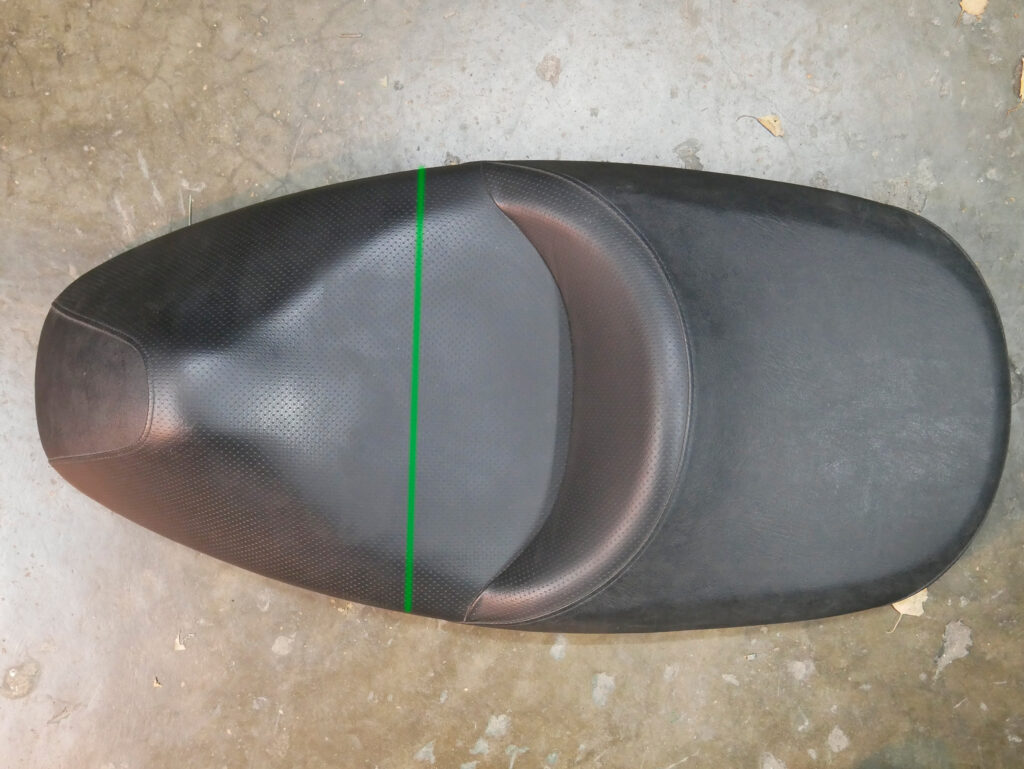
If you want to do a really cheap job, you can sew in a patch in the marked place, you will save on upholstery shop:
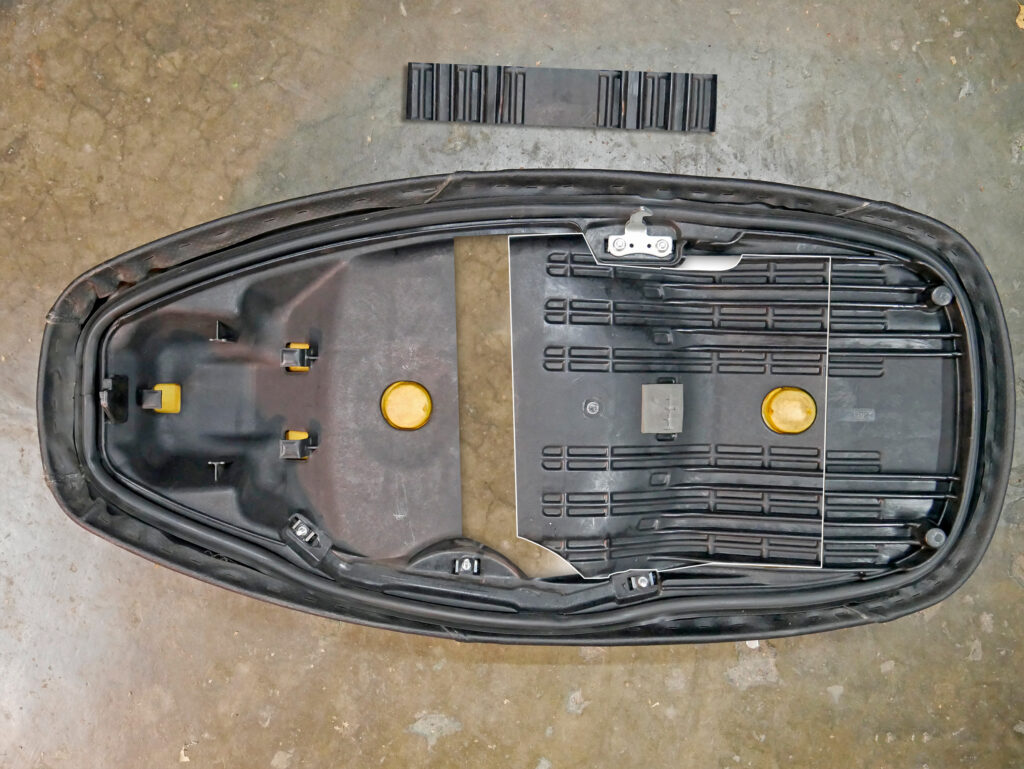
Let’s modify the plastic
Let us get to the most important part of the job – plastic cutting and modification.
Use angle grinder with metal cutting disc to cut the seat’s plastic along the lines shown in pink:
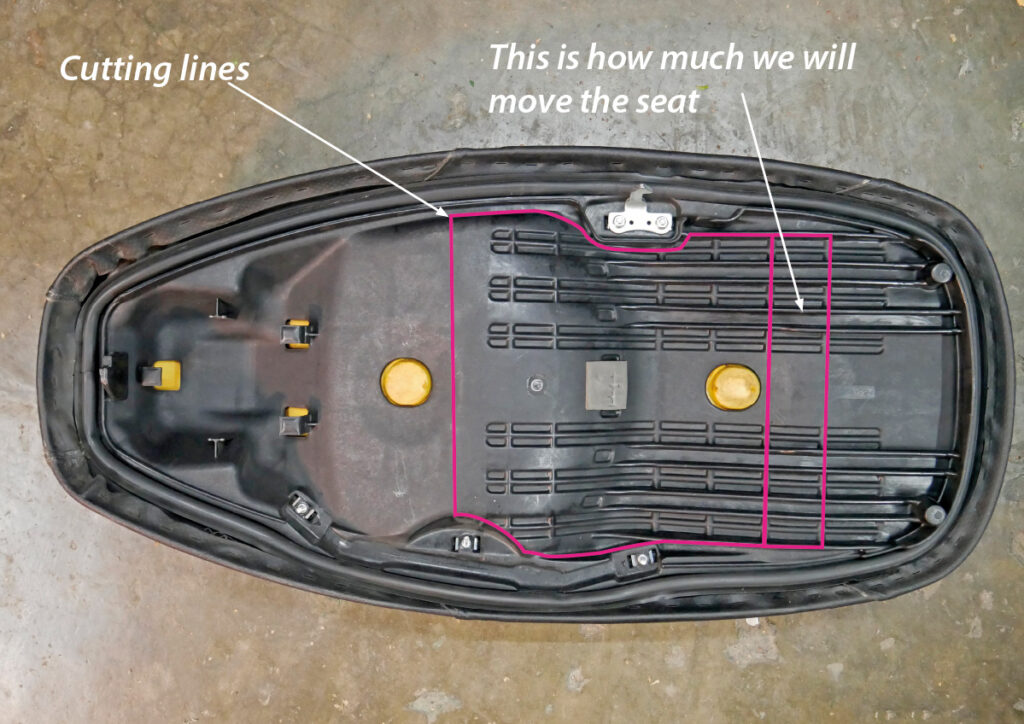
The idea is that we will move the small rectangular bit to the front, making more room for the driver. Like this:

This is how it looks like step by step:
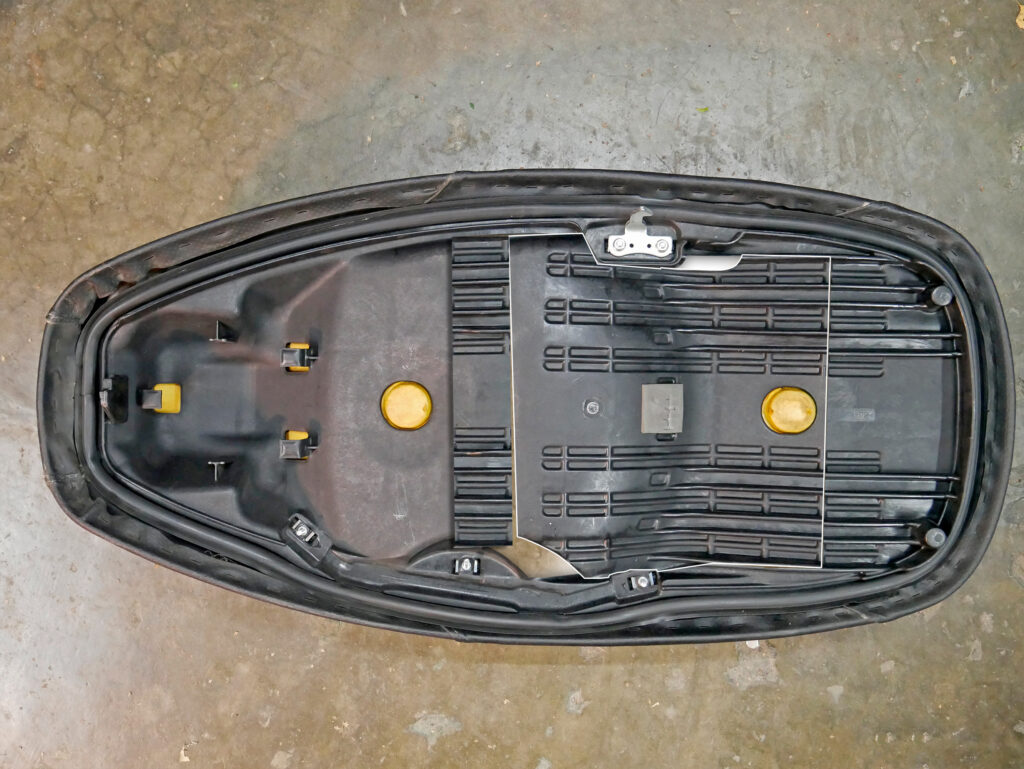
Cutting like this allows you to re-use existing foams, even the mounting holes keeping foams in place will fit – this is why you cut this way.
Don’t worry about empty spaces, we will fill them at later stage.
Now it is time to stick the elements together somehow. We must keep them firmly in place while we do the actual real joints.
I used a large soldering iron and soldered the plastics. The whole operation stinks, but works. You can glue, you can use cable ties, whatever will hold these things together will do.
It does not need to have structural strength.
Fiberglass mat and epoxy resin – this is how you make it strong
There is no way you could glue the pieces in a way it will sustain your weight jumping up and down.
We need to use a technique from ship building industry – glass fiber mat with epoxy resin.
The composite material that is create has enormous strength, perfect for our application.
Preparatory steps
If you are new to fiber glass composite, there are two things you need to know and do.
First – this material does not like bends and cavities. It works best on flat surfaces.
Thus, you need to get rid of all things that are not flat. I used sandpaper disc (40-60 grit) on angle grinder.
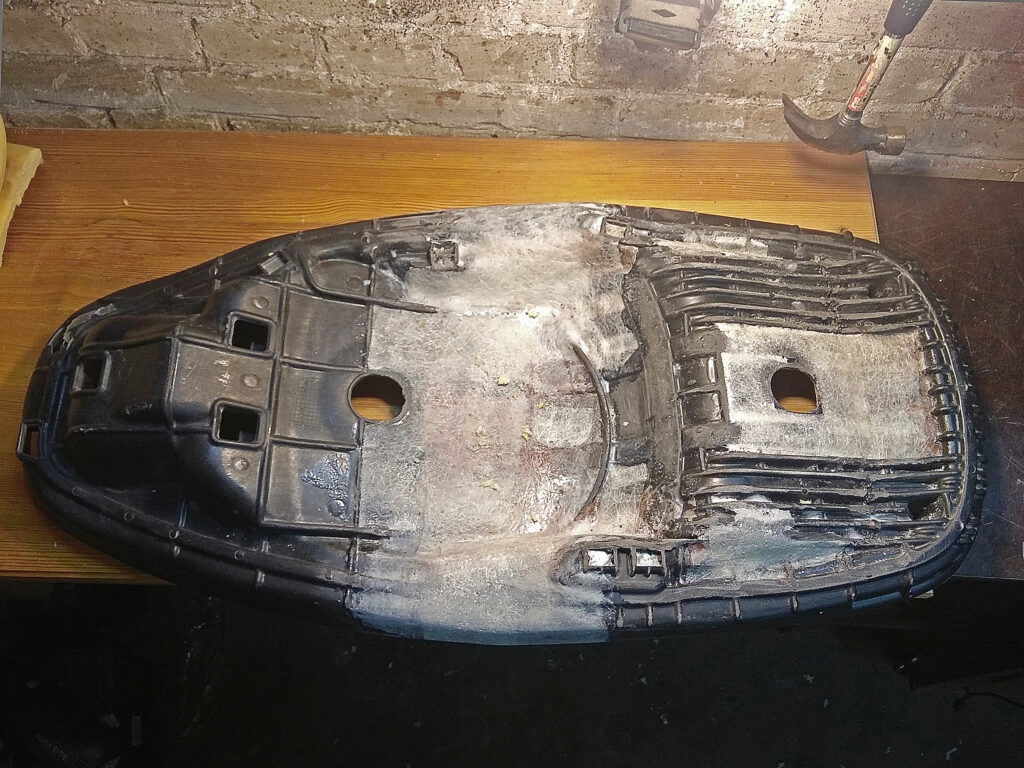
The plastic is soft, sandpaper works in seconds. On the photo below you can see type of things you have to remove in places where glass fiber with resin will go.
The second thing is that every surface that will be laminated has to be roughened.
Every bit of shiny plastic will make it difficult for the resin to bond. Thus, roughen every bit you will laminate with 120 grit sandpaper.
Finally, the surfaces need to be degreased using isopropyl alcohol or similar degreasing substance.
This also promotes stronger bond, as the resin is not so keen to stick to plastics.
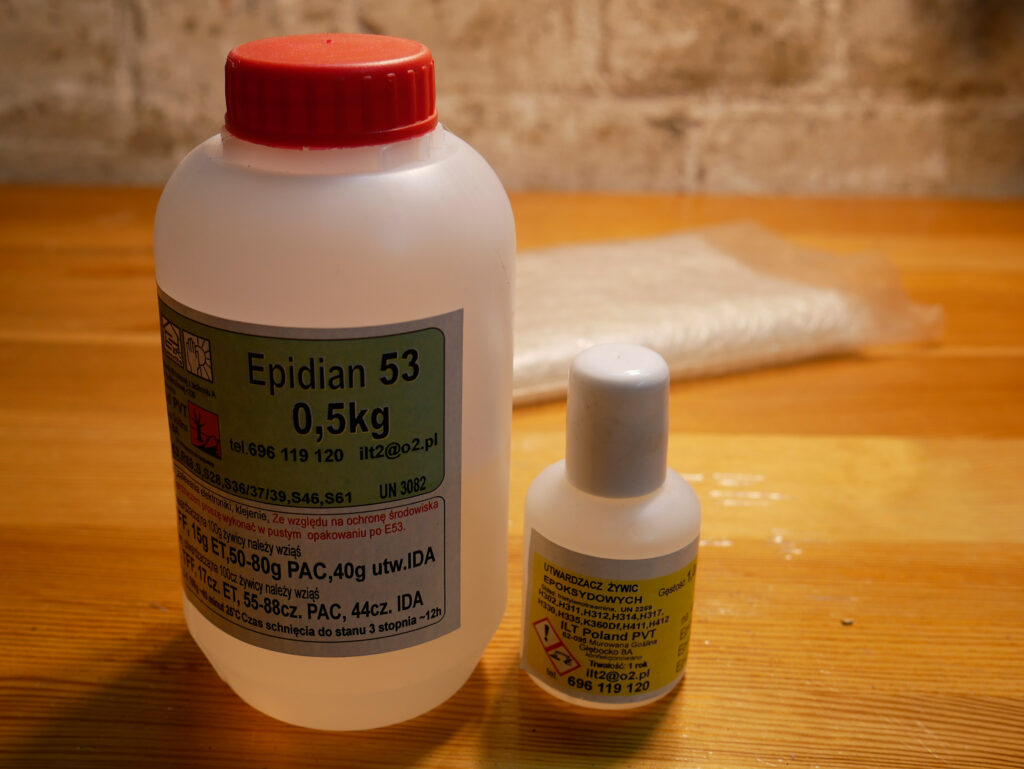
Resin and mat choice
As I don’t know where you live, I cannot give you advice to brand of the resin.
You need to use epoxy resin suitable for laminating. Do not use much cheaper polyester resin, as it does not dry well and has worse bond to plastic that epoxy one.
Use glass mat suitable for use with epoxy resins Use glass mat that is roughtly 450g/square meter.
Above you have a rough idea how it should look like. Lay 3 layers of glassfiber mat.
As you can see my laminate form kind of a basin that overlaps the edges of the seat. This is to make it stronger and transfer the weight to the edges that are supported by the scooter itself.
You should do similar job on the flip side.
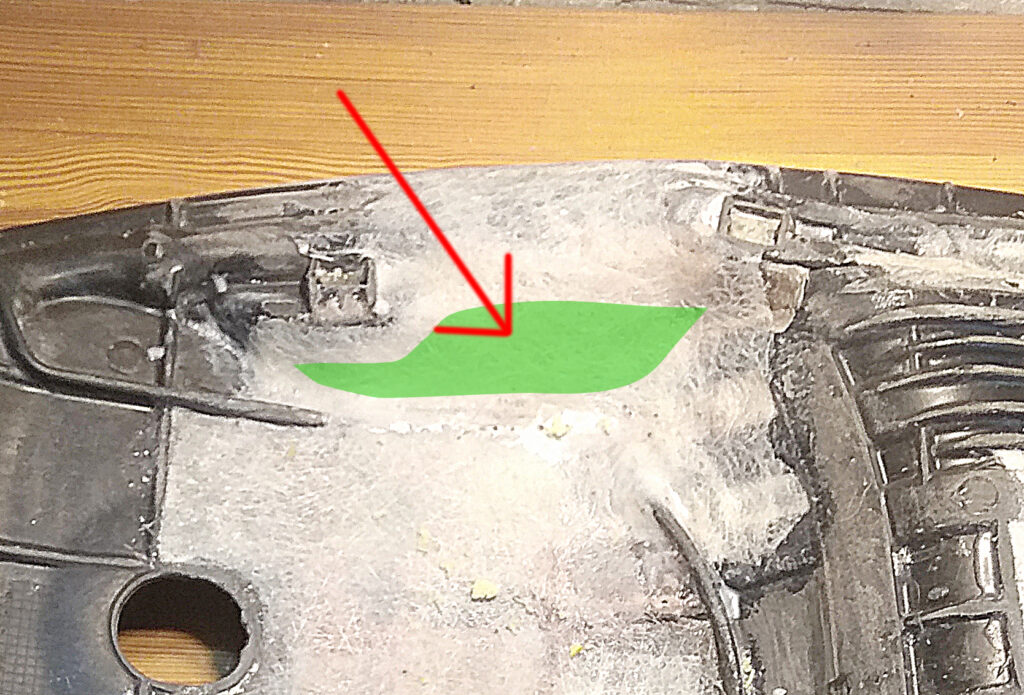
As you can see above, the empty space (marked in green) got rebuilt using glassfiber and resin composite.
In order to fill the holes, you need to put some material behind them. I used soft cardboard.
It does not have to be stron, it just needs to support the resin with glass mat while it dries.
After 24 hours you can polish the laminate if there is a need. You need just to clear it up a bit, it will go under the foams and upholstery anyway, so just clean it up.
Remember that fibreglass dust is very irritating, use a mask and cover your body.
Remove the clothes you used for polishing right away after finished job.
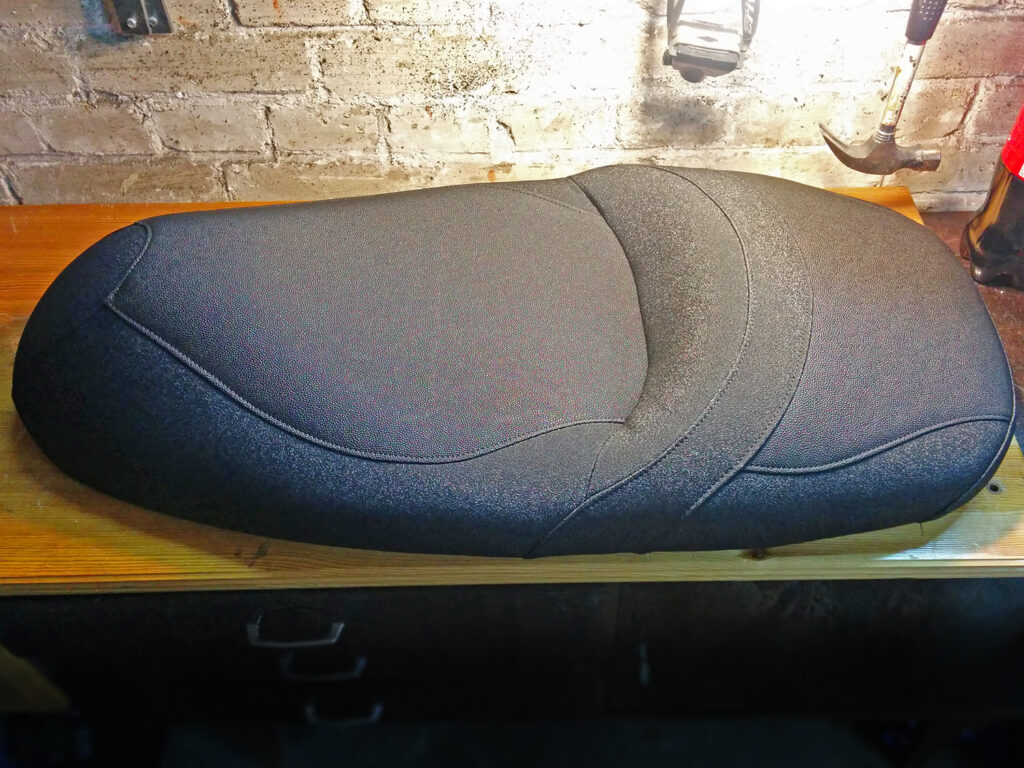
The last step is to cut the foams as mentioned above and to give the seat to the upholstery shop – or sew the seat cover yourself.
The above is where I finished my part. I gave the seat to the upholstery shop to get new seat cover done.
It actually turned out better than original one, as the guys made it partially of anti-slip material.
Is it worth the hassle?
Comfort-wise it is absolutely worth it.
For me this modification made me keep the scooter instead of selling it.
I can travel for hours without being tired or sore. I would say I achieved comfort level comparable to Honda Forza 125.
S-wings are old now, and thus they get cheaper. But they are still fantastic machines with fuel consumption below 3l/100km.
Also speed and acceleration are in par with much newer maxiscooters, like Yamaha N-max for example.
The seat modification gives S-wing a new life.
My full cost including materials and new upholstery was 140 euro – in Poland. Of course, it can be more expensive in Western countries, but even if it turns out to be twice as expensive, it will still be worth it.
With the seat moved 8cm back, my default position now is feet forward resting on front footrests.
In case of sudden braking, my weight gets transfered to the scooter by my feet, as they are firmly propped against footrests.
So it does not go to the steering – improving safety.
Manoeuvrability is also improved, as I my knees do not prevent maximum handlebar turn in tight turns.
These 8cm back do not seem like much, but I think this modification means a new life and many years of fun out of the lovely little scooter Honda S-wing is.
If you feel your S-wing is not as comfortable as it should, give this modification a go, you will not regret it.